製品の概要
Raspberry Pi用の 3.5" 320x480 TFT Display です。 Raspberry PiのGPIOピンにLCDのコネクタを差し込んで取り付けます。Raspberry Piとピッタリの大きさです。
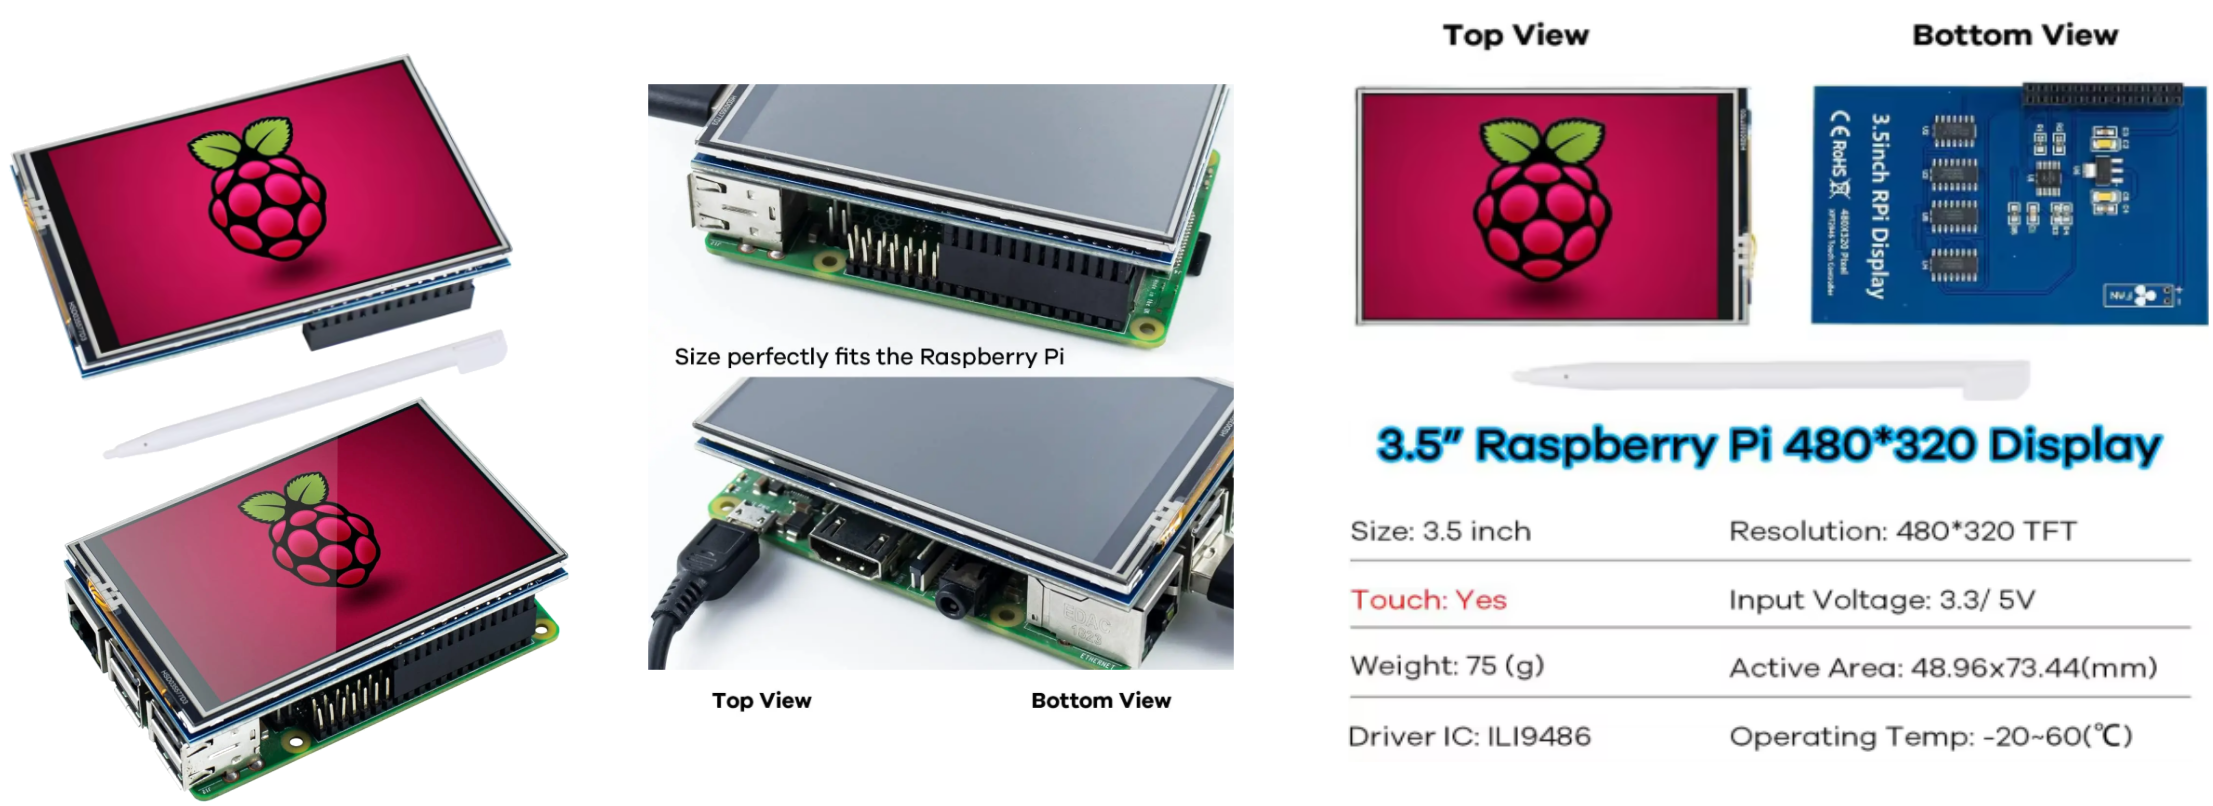
LDC SPEC
| Resolution | 320 x 480 px |
|---|---|
| Controller | ILI9488 |
| Interface | SPI (4-wire) |
| Input Voltage | 3.3 / 5V |
| Size & Weight | 3.5" / 75(g) |
Raspberry PIとの接続

LCDのコネクタはRaspberry Piの1から26番ピンに挿入されます。 上記赤枠で囲ったピンが使用されています。GPIO7から11はSPI関係の信号。 GPIO17はLCDからの割り込み信号。GPIO24はData/Command管理信号。GPIO25はLCDのRESETです
このリンク I finally have the 3.5inch GPIO SPI LCD working with the raspberry pi 5 and this is how に従って行ったら表示出来ました。手順は以下の通り
- OS (Bookworm)をRaspberry Pi(今回はRaspberry Pi 3B)にインストール
- モニターがらsudo raspi-configを実行
- “3 Interface Options”でSPIを有効にする
- “6 Advanced Options” -> “A6 Wayland”で “W1 X11″を選択
- 設定を保存。起動せずにraspi-configを抜ける
- /boot/firmware/config.txtを編集する
- 設定ファイルを編集するsudo nano /boot/firmware/config.txt
- “dtoverlay=vc4-kms-v3d”の行をコメントアウト(先頭に”#”を付ける)
- ファイルの最後に” dtoverlay=piscreen,speed=18000000,drm “を追加
- ファイルを保存してReboot。
- 設定ファイルを編集するsudo nano /boot/firmware/config.txt
- 立ち上がったら下記を実行
- apt-get install xserver-xorg-input-evdev
- sudo mv /usr/share/X11/xorg.conf.d/10-evdev.conf /usr/share/X11/xorg.conf.d/45-evdev.conf
- sudo nano /usr/share/X11/xorg.conf.d/45-evdev.conf
- 45-evdev.confに下記を追加
Section "InputClass"
   Identifier "evdev touchscreen catchall"
   MatchIsTouchscreen "on"
   MatchDevicePath "/dev/input/event*"
   Driver "evdev"
   Option "InvertX" "false"
   Option "InvertY" "true"
EndSection
- ファイルを保存してReboot
- sudo touch /etc/X11/xorg.conf.d/99-calibration.conf
- sudo apt-get install xinput-calibrator
- sudo reboot
- 立ち上がったらターミナルで、”DISPLAY=:0.0 xinput_calibrator”を実行
- タッチパネルのキャリブレーションが始まります。
- 指示通りに行って下さい。
最後に
最初上手く動かなかったのですがリンクサイトを見つけて表示する事が出来ました。 もちろんマウス、キーボードも正常に機能しています。